 Most people use the default DNS
settings provided by their ISP, and
while they are usually sufficient
for most purposes, there are
plenty of free options out there,
like OpenDNS and Google DNS.
Namebench is a free app that
checks to see whether your
current settings are optimized and,
if not, which free option is best for
you. Here's how to use it:
Download and install Namebench. DOWNLOAD HERE
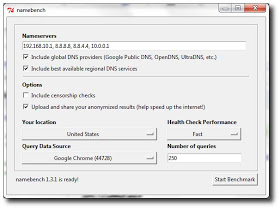
Fire it up and choose your settings.
Keep the top two boxes checked. If
you're concerned about network
censorship, check the third box,
and if you want to help the
developers, check the last box. You
can tweak the rest if you're
outside U.S. or want to experiment
with different browsers.
Click Start Benchmark and wait
while Namebench runs its tests. It
should take several minutes. A
browser tab should pop open when
Namebench is done and give you a
list of DNS servers and how much
faster they are than the one
you're currently using, unless
yours are already the fastest
possible.
Namebench does not change your
settings, but it's generally pretty
easy to do it yourself. Check with
the instructions you got from your
ISP to set up your modem and/or
router and just substitute the DNS
addresses you received from
Namebench for the addresses given
by your ISP. It's best to do this
with your router, as it will assign
that DNS address for all the
devices attached to it.
That's it! This can dramatically
improve your browsing speed, and
it's fairly easy to work through.
Most people use the default DNS
settings provided by their ISP, and
while they are usually sufficient
for most purposes, there are
plenty of free options out there,
like OpenDNS and Google DNS.
Namebench is a free app that
checks to see whether your
current settings are optimized and,
if not, which free option is best for
you. Here's how to use it:
Download and install Namebench. DOWNLOAD HERE
Fire it up and choose your settings.
Keep the top two boxes checked. If
you're concerned about network
censorship, check the third box,
and if you want to help the
developers, check the last box. You
can tweak the rest if you're
outside U.S. or want to experiment
with different browsers.
Click Start Benchmark and wait
while Namebench runs its tests. It
should take several minutes. A
browser tab should pop open when
Namebench is done and give you a
list of DNS servers and how much
faster they are than the one
you're currently using, unless
yours are already the fastest
possible.
Namebench does not change your
settings, but it's generally pretty
easy to do it yourself. Check with
the instructions you got from your
ISP to set up your modem and/or
router and just substitute the DNS
addresses you received from
Namebench for the addresses given
by your ISP. It's best to do this
with your router, as it will assign
that DNS address for all the
devices attached to it.
That's it! This can dramatically
improve your browsing speed, and
it's fairly easy to work through.
Sunday, 14 July 2013
Speed your browser by changing your DNS
Most people use the default DNS
settings provided by their ISP, and
while they are usually sufficient
for most purposes, there are
plenty of free options out there,
like OpenDNS and Google DNS.
Namebench is a free app that
checks to see whether your
current settings are optimized and,
if not, which free option is best for
you. Here's how to use it:
Download and install Namebench. DOWNLOAD HERE
Fire it up and choose your settings.
Keep the top two boxes checked. If
you're concerned about network
censorship, check the third box,
and if you want to help the
developers, check the last box. You
can tweak the rest if you're
outside U.S. or want to experiment
with different browsers.
Click Start Benchmark and wait
while Namebench runs its tests. It
should take several minutes. A
browser tab should pop open when
Namebench is done and give you a
list of DNS servers and how much
faster they are than the one
you're currently using, unless
yours are already the fastest
possible.
Namebench does not change your
settings, but it's generally pretty
easy to do it yourself. Check with
the instructions you got from your
ISP to set up your modem and/or
router and just substitute the DNS
addresses you received from
Namebench for the addresses given
by your ISP. It's best to do this
with your router, as it will assign
that DNS address for all the
devices attached to it.
That's it! This can dramatically
improve your browsing speed, and
it's fairly easy to work through.

Cool Computer Tricks
 Looking cool computer tricks? Here
is something that should pique
your interest: Use Keyboard As
Mouse, On Screen Keyboard and
Transform your Windows XP in to
Windows 7.
Use Keyboard As Mouse
:-
When mouse isn't working
properly , this trick can be very
helpful. To activate mouse keys all
you do is press Alt+Left shift key +
NumLock and click OK or press
enter .
Use the Numerical pad for
controlling the mouse pointer.
5 is for click.
+ is for double click
- for right click.
On Screen Keyboard:-
On screen keyboard is one of the
coolest windows features that
displays a virtual keyboard on the
computer screen that allows people
with mobility impairments to type
data by using a pointing device or
joystick..
To use it go to start-> run and type
osk
Transform your Windows XP in to
Windows 7:-
If you are using Windows XP and
want to experience Windows 7
without installing then here is
Seven Remix XP transformation
pack to transform Windows XP to
Windows 7.With this simple app
you can make your XP look like
Windows 7 in just few clicks. It
supports Windows XP, Windows
2003, Windows Media Center
Edition and some other flavors of
XP. Will work with only 32 bit
edition of Windows.
Just download it and install .
click HERE
to Download Seven
Remix XP and transform your
windows xp .
Use Keyboard As Mouse
On Screen Keyboard
Transform your Windows XP in to
Windows 7
Looking cool computer tricks? Here
is something that should pique
your interest: Use Keyboard As
Mouse, On Screen Keyboard and
Transform your Windows XP in to
Windows 7.
Use Keyboard As Mouse
:-
When mouse isn't working
properly , this trick can be very
helpful. To activate mouse keys all
you do is press Alt+Left shift key +
NumLock and click OK or press
enter .
Use the Numerical pad for
controlling the mouse pointer.
5 is for click.
+ is for double click
- for right click.
On Screen Keyboard:-
On screen keyboard is one of the
coolest windows features that
displays a virtual keyboard on the
computer screen that allows people
with mobility impairments to type
data by using a pointing device or
joystick..
To use it go to start-> run and type
osk
Transform your Windows XP in to
Windows 7:-
If you are using Windows XP and
want to experience Windows 7
without installing then here is
Seven Remix XP transformation
pack to transform Windows XP to
Windows 7.With this simple app
you can make your XP look like
Windows 7 in just few clicks. It
supports Windows XP, Windows
2003, Windows Media Center
Edition and some other flavors of
XP. Will work with only 32 bit
edition of Windows.
Just download it and install .
click HERE
to Download Seven
Remix XP and transform your
windows xp .
Use Keyboard As Mouse
On Screen Keyboard
Transform your Windows XP in to
Windows 7
How to bypass trial limitation in any software
Hello fellas , is me again and umm today i will be talking about how
to bypass trial limitations in any software. Note these tutorial is
not meant to crack the software but to help you extend the trial
limites .
HOW TO BYPASS TRIAL LIMITATIONS IN ANY SOFTWARE
1. Goto sandboxie
comand download the software
2. Install and run it
3.click on the sandbox-->defaultbox-->run sandbox and then click on
run any program
4. Now a new window will popup. Click on browse
5. Locate the setup of the trial software you want to install and click on open
6. Install the software and run it.You will see # in the software
tittle bar.It indicates that the software is running under sandboxie.
7. You will get the trial of the software and the trial version will
expire after the time bound limitation is over.
8. To reuse the software again after the trial version is over click
on Click Sandbox –> DefaultBox and click Delete Contents .
( Note : Donot let the software expire.Do these steps before atleast
1-day of the trial software is left.otherwise the above trick may not
work )
--> This will open up a new window and delete all the files created,
Press the Delete Sandbox button to fully clear thecontents.
Now reinstall the software as mentioned above and you will again get
the full trial version.
Note:
This trick will not work if you have already usedthe full trial
version of the software without sandboxie.
2.Sandboxie may crash if you run very large programs with it.
Warning:This tutorial is only for educational purpose.
25 PROVEN WAYS TO MAKE YOUR PC FASTER
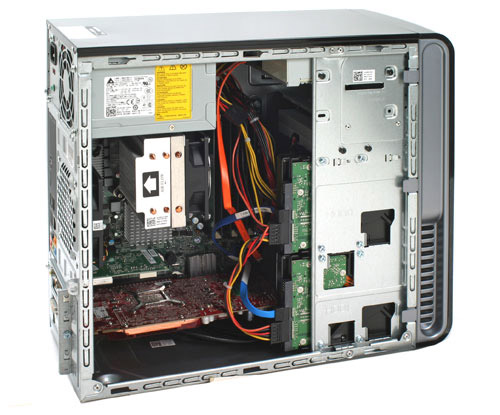 Following are more than 25 ways which
can boost your PC performance right now
and make PC work faster as new.
1. Use the Windows Performance Toolkit
and the trace logs to speed up Windows
boot time.
2. Perform a virus scan on your computer
regularly. If you don't want to install
virus protection, use some of the free
online virus scanners.
3. Use web accelerators, which are
programs that try to prefetch and cache
the sites you are going to visit.
4. Make sure that there are no bad sectors
or other errors on your hard drive.
5. If you have a SATA drive and you're
running Windows Vista, you can speed
up your PC by enabling the advanced
write caching features.
6. Reduce the number of fonts that your
computer has to load up on startup to
increase performance.
7. Remove unnecessary old programs
from the Add/Remove dialog of the
Control Panel often.
8. Update all of your drivers in Windows,
including chipset and motherboard
drivers to their latest versions.
9. Partition your hard drives correctly to
maximize performance.
10. Speed up Mozilla Firefox by tweaking
the configuration settings and by
installing an add-on called FasterFox.
11. Speed up the Start Menu in Windows by
customizing or adding the
'MenuShowDelay' key in the registry.
12. Make sure that you have selected
"Adjust for best performance" on the
Performance tab in Computer System
Properties.
13. Make sure to download all the latest
Windows Updates, Service Packs, and
hot fixes as they normally help your
computer work better.
14. Clean registry by removing broken
shortcuts, missing shared DLLs, invalid
paths, invalid installer references and
more.
15. If you are running a 32-bit version of
Windows and have 4GB of RAM or more,
you can force Windows to see and use
all of the RAM by enabling PAE.
16. If you are not using some of the
hardware on your computer, i.e. floppy
drive, CD-ROM drive, USB ports, IR ports,
etc, then go into your BIOS and disable
them so that they do not use any power
and do not have to be loaded during
boot up.
17. Enable DMA mode in Windows XP for IDE
ATA/ATAPI Controllers in Device
Manager.
18. Replace a slow hard drive with a faster
7200 RPM drive, SATA drive, or SAS
drive.
19. Turn visual effects off by going to
Performance Options.
20. Speed up the Send To menu in Explorer
by typing "sendto" in the Run dialog
box and deleting unnecessary items.
21. Disable unnecessary Windows services,
settings, and programs that slow down
your computer.
22. Make icons appear faster while
browsing in My Computer by disabling
search for network files and printers.
23. Tweak Windows using free programs
24. If you already have anti-spyware
software installed, turn off Windows
Defender protection.
25. If you do not use the Recent Documents
feature in Windows, then disable it
completely.
Following are more than 25 ways which
can boost your PC performance right now
and make PC work faster as new.
1. Use the Windows Performance Toolkit
and the trace logs to speed up Windows
boot time.
2. Perform a virus scan on your computer
regularly. If you don't want to install
virus protection, use some of the free
online virus scanners.
3. Use web accelerators, which are
programs that try to prefetch and cache
the sites you are going to visit.
4. Make sure that there are no bad sectors
or other errors on your hard drive.
5. If you have a SATA drive and you're
running Windows Vista, you can speed
up your PC by enabling the advanced
write caching features.
6. Reduce the number of fonts that your
computer has to load up on startup to
increase performance.
7. Remove unnecessary old programs
from the Add/Remove dialog of the
Control Panel often.
8. Update all of your drivers in Windows,
including chipset and motherboard
drivers to their latest versions.
9. Partition your hard drives correctly to
maximize performance.
10. Speed up Mozilla Firefox by tweaking
the configuration settings and by
installing an add-on called FasterFox.
11. Speed up the Start Menu in Windows by
customizing or adding the
'MenuShowDelay' key in the registry.
12. Make sure that you have selected
"Adjust for best performance" on the
Performance tab in Computer System
Properties.
13. Make sure to download all the latest
Windows Updates, Service Packs, and
hot fixes as they normally help your
computer work better.
14. Clean registry by removing broken
shortcuts, missing shared DLLs, invalid
paths, invalid installer references and
more.
15. If you are running a 32-bit version of
Windows and have 4GB of RAM or more,
you can force Windows to see and use
all of the RAM by enabling PAE.
16. If you are not using some of the
hardware on your computer, i.e. floppy
drive, CD-ROM drive, USB ports, IR ports,
etc, then go into your BIOS and disable
them so that they do not use any power
and do not have to be loaded during
boot up.
17. Enable DMA mode in Windows XP for IDE
ATA/ATAPI Controllers in Device
Manager.
18. Replace a slow hard drive with a faster
7200 RPM drive, SATA drive, or SAS
drive.
19. Turn visual effects off by going to
Performance Options.
20. Speed up the Send To menu in Explorer
by typing "sendto" in the Run dialog
box and deleting unnecessary items.
21. Disable unnecessary Windows services,
settings, and programs that slow down
your computer.
22. Make icons appear faster while
browsing in My Computer by disabling
search for network files and printers.
23. Tweak Windows using free programs
24. If you already have anti-spyware
software installed, turn off Windows
Defender protection.
25. If you do not use the Recent Documents
feature in Windows, then disable it
completely.
How to activate windows 7; make it Genuine
Make Windows 7 genuine using Command Prompt !! Press Windows key + R Type cmd (press enter)
Run CMD as Administrator In command prompt type SLMGR - REARM
Hit Enter A message will appear Cmd successfull plz restart pc
Restart The PC done !! And your windows is activated ... #end
How to encrypt your external drives (Locking your flash drives)
 A lot of us that are into computer
security are always meticulous
about the security of our data. We
provide passwords on our PC. Some
of us go to the extent of creating
BIOS password, syskey, and then
the windows login password. Some
with extra paranoia will even use
softwares like folder lock or PGP to
encrypt their files and folders.
This
is really good and I am also a big
fan of security because I implement
it a lot but when I become the
attacker, I hate security.
I realized that all these accounting
bank managers that are so careful
with their data and some other
individuals also will just provide all
these security on their computers.
Forgetting the fact that some of
those information are in their flash
drives, they just drop their flash
drives carelessly sometimes.
Sometimes it may not be a careless
drop, you may get a physical
attack and your flash drive will be
stolen from you.
Here I will show you a way to
provide complete security to the
data on your flash drives and
other external drives.
You do not need to download any
software.
Note: This tutorial is for windows
users only
Follow these steps to encrypt your
drive:
1. Plug in the external drive into
the USB port
2. Go to my computer and right-
click the drive to be encrypted as
shown below
Now click "Turn on Bitlocker"
3. You will see something like this
Click the first check button and
provide the password you want for
your drive then click next
4. Our computers know we are
likely to forget some things so
they provide us with backup
option. Save a recovery file and if
suits you to print it then do that
and proceed
Now there is a big question for
you.
Are you ready to encrypt? If
you're with me on this then
continue
Grab a snack and chill for the
encryption to be over.
And that's it. The encryption is
over
To test this, you can unplug your
drive and plug again.
Now you
have to type your password. I hope
this post helps you security
fanatics
A lot of us that are into computer
security are always meticulous
about the security of our data. We
provide passwords on our PC. Some
of us go to the extent of creating
BIOS password, syskey, and then
the windows login password. Some
with extra paranoia will even use
softwares like folder lock or PGP to
encrypt their files and folders.
This
is really good and I am also a big
fan of security because I implement
it a lot but when I become the
attacker, I hate security.
I realized that all these accounting
bank managers that are so careful
with their data and some other
individuals also will just provide all
these security on their computers.
Forgetting the fact that some of
those information are in their flash
drives, they just drop their flash
drives carelessly sometimes.
Sometimes it may not be a careless
drop, you may get a physical
attack and your flash drive will be
stolen from you.
Here I will show you a way to
provide complete security to the
data on your flash drives and
other external drives.
You do not need to download any
software.
Note: This tutorial is for windows
users only
Follow these steps to encrypt your
drive:
1. Plug in the external drive into
the USB port
2. Go to my computer and right-
click the drive to be encrypted as
shown below
Now click "Turn on Bitlocker"
3. You will see something like this
Click the first check button and
provide the password you want for
your drive then click next
4. Our computers know we are
likely to forget some things so
they provide us with backup
option. Save a recovery file and if
suits you to print it then do that
and proceed
Now there is a big question for
you.
Are you ready to encrypt? If
you're with me on this then
continue
Grab a snack and chill for the
encryption to be over.
And that's it. The encryption is
over
To test this, you can unplug your
drive and plug again.
Now you
have to type your password. I hope
this post helps you security
fanatics
You can optionally sign a JAR file with your electronic "signature." Users who verify your signature can grant your JAR-bundled software security privileges that it wouldn't ordinarily have. Conversely, you can verify the signatures of signed JAR files that you want to use.
This lesson shows you how to use the tools provided in the JDK to sign and verify JAR files:
Understanding Signing and Verification
If you're not familiar with the concepts of signing and verification, this section will help to bring youup to speed. It contains definitions of the relevantterms, explanations of some of the benefits provided by signing, and an outline of the signing mechanism used by the Java platform as it relatesto JAR files.
Signing JAR Files
In this section, you'll learn how to use the JDK™ tools to digitally sign your JAR files
Signing and Verifying JAR Files
You can optionally sign a JAR file with your electronic "signature." Users who verify your signature can grant your JAR-bundled software security privileges that it wouldn't ordinarily have. Conversely, you can verify the signatures of signed JAR files that you want to use.
This lesson shows you how to use the tools provided in the JDK to sign and verify JAR files:
Understanding Signing and Verification
If you're not familiar with the concepts of signing and verification, this section will help to bring youup to speed. It contains definitions of the relevantterms, explanations of some of the benefits provided by signing, and an outline of the signing mechanism used by the Java platform as it relatesto JAR files.
Signing JAR Files
In this section, you'll learn how to use the JDK™ tools to digitally sign your JAR files
Signing JAR Files
You use the JAR Signing and Verification Tool to sign JAR files. You invoke the JAR Signing and Verification Tool by using the jarsigner command, so we'll refer to it as "Jarsigner" for short.
To sign a JAR file, you must first have a private key. Private keys and their associated public-key certificates are stored in password-protected databases called keystores . A keystore can hold the keys of many potential signers. Each key in the keystore can be identified by an alias which istypically the name of the signer who owns the key. The key belonging to Rita Jones might have the alias "rita", for example.
The basic form of the command for signing a JAR file is
jarsigner jar-file alias
In this command:
*. jar-file is the pathname of the JAR file that's to be signed.
*. alias is the alias identifying the private key that's to be used to sign the JAR file, and the key's associated certificate.
The Jarsigner tool will prompt you for the passwords for the keystore and alias.
This basic form of the command assumes that the keystore to be used is in a file named .keystore in your home directory. It will create signature and signature block files with names x.SF and x.DSA respectively, where x is the first eight letters of the alias, all converted to upper case. This basic command will overwrite the original JAR file withthe signed JAR file.
In practice, you may want to use this command in conjunction with one or more of these options, which must precede the jar-file pathname:
Jarsigner Command Options
Option Description
-keystore url Specifies a keystore to be used if you don't want to use the .keystore default database.
-storepass password Allows you to enter the keystore's password on the command line rather than be prompted for it.
-keypass password Allows you to enter your alias's password on the command line rather than be prompted for it.
-sigfile file Specifies the base name for the .SF and .DSA filesif you don't want the base name to be taken from your alias. file must be composed only of upper case letters (A-Z), numerals (0-9), hyphen (-), and underscore (_).
-signedjar file Specifies the name of the signed JAR file to be generated if you don't want the original unsigned file to be overwritten with the signed file.
Example
Let's look at a couple of examples of signing a JARfile with the Jarsigner tool. In these examples we will assume:
*. your alias is "johndoe".
*. the keystore you want to use is in a file named"mykeys" in the current working directory.
*. the keystore's password is "abc123".
Under these assumptions, you could use this command to sign a JAR file named app.jar :
jarsigner -keystore mykeys -storepass abc123 app.jar johndoe
You will be prompted for the keystore password. Because this command doesn't make use of the -sigfile option, the .SF and .DSA files it creates would be named JOHNDOE.SF and JOHNDOE.DSA . Because the command doesn't use the -signedjar option, the resulting signed file will overwrite the original version of app.jar .
Let's look at what would happen if you used a different combination of options:
jarsigner -keystore mykeys -sigfile SIG -signedjar SignedApp.jar app.jar johndoe
This time, you would be prompted to enter the passwords for both the keystore and your alias because the passwords aren't specified on the command line. The signature and signature block files would be named SIG.SF and SIG.DSA , respectively, and the signed JAR file SignedApp.jar would be placed in the current directory. The original unsigned JAR file would remain unchanged.
HOW TO READ NEPALI FONTS IN OPERA MINI FOR NOKIA AND ANDROIDS
Opera mini is the most widely used and preferredover any other browsers available because of its user friendly and easy to use user interface. It supports wide range of handsets and has many eye catching features.Despite of its many features,it lacks the function to read any other fonts rather than english
So it has been difficult for some Nepali opera mini users because they are not being able to seeor read Nepali fonts in opera mini.But with this simple trick you will be able to read Nepali easilyon your device.
I am going to teach you, how to read Nepali fonts in opera mini?
Just follow these easy steps and you can easily read or install nepali language in opera mini(Devnagari)!
Firstly runOpera mini
Then go adress bar and remove www. and type about:config
You will to directed to a page with power user setting of Opera mini like in the picture
Scroll down to the last of page and enable Bitmap font for Complex Script
Select Yes and click on save
Now you should be able to read all the fonts including Nepali.
ENJOY READING NEPALI
HOW TO READ NEPALI FONTS IN OPERA MINI FOR NOKIA AND ANDROIDS
Opera mini is the most widely used and preferredover any other browsers available because of its user friendly and easy to use user interface. It supports wide range of handsets and has many eye catching features.Despite of its many features,it lacks the function to read any other fonts rather than english
So it has been difficult for some Nepali opera mini users because they are not being able to seeor read Nepali fonts in opera mini.But with this simple trick you will be able to read Nepali easilyon your device.
I am going to teach you, how to read Nepali fonts in opera mini?
Just follow these easy steps and you can easily read or install nepali language in opera mini(Devnagari)!
Firstly runOpera mini
Then go adress bar and remove www. and type about:config
You will to directed to a page with power user setting of Opera mini like in the picture
Scroll down to the last of page and enable Bitmap font for Complex Script
Select Yes and click on save
Now you should be able to read all the fonts including Nepali.
ENJOY READING NEPALI
HOW TO READ NEPALI FONTS IN OPERA MINI FOR NOKIA AND ANDROIDS
Opera mini is the most widely used and preferredover any other browsers available because of its user friendly and easy to use user interface. It supports wide range of handsets and has many eye catching features.Despite of its many features,it lacks the function to read any other fonts rather than english
So it has been difficult for some Nepali opera mini users because they are not being able to seeor read Nepali fonts in opera mini.But with this simple trick you will be able to read Nepali easilyon your device.
I am going to teach you, how to read Nepali fonts in opera mini?
Just follow these easy steps and you can easily read or install nepali language in opera mini(Devnagari)!
Firstly runOpera mini
Then go adress bar and remove www. and type about:config
You will to directed to a page with power user setting of Opera mini like in the picture
Scroll down to the last of page and enable Bitmap font for Complex Script
Select Yes and click on save
Now you should be able to read all the fonts including Nepali.
ENJOY READING NEPALI
Thursday, 4 April 2013
You can optionally sign a JAR file with your electronic "signature." Users who verify your signature can grant your JAR-bundled software security privileges that it wouldn't ordinarily have. Conversely, you can verify the signatures of signed JAR files that you want to use.
This lesson shows you how to use the tools provided in the JDK to sign and verify JAR files:
Understanding Signing and Verification
If you're not familiar with the concepts of signing and verification, this section will help to bring youup to speed. It contains definitions of the relevantterms, explanations of some of the benefits provided by signing, and an outline of the signing mechanism used by the Java platform as it relatesto JAR files.
Signing JAR Files
In this section, you'll learn how to use the JDK™ tools to digitally sign your JAR files
Sunday, 16 September 2012
1. First of all make sure you have chosen mmc as message storage ever if not do it now if it ask to copy press no.
2. Then get the " Mail " folder of S60V2 handset and copy it to P.C.
3. You will get that folder from { \system\mail Where ! is drive you choosed }
4. now connect your S60V3 handse t to pc via cable in data transfer mode {you must have to change message memory to phone memory}
5. once connected go to { \private\1000484b Where ! is your MMC drive at P.C .}
6. Now open the folder mail of S60V2 Handset that you had just copied to P.C. and select the content of it and paste in the folder of S60V3 handset that is { \private\1000484b Where ! is your MMC drive at P.C. } .
7. now replace all file when it prompt
8. Its done now disconnect your handset and change your message memory to Memory card
9. if you followed every thing you will be successful
[NOTE:- Dont copy paste the whole "mail" folder of S60V2 handset and rename it to mail2 it will fail just copy all files insideit and paste inside "mail2" folder]
Thursday, 13 September 2012
As oxygen is important to man, soalso battery to laptop. Laptop users understand that the performance of the whole system depends a lot on the battery power.
Today, modern graphics, hungry applications and intensive operating system are cutting down the life of laptop battery every day. To make your laptop battery last, you need to take a good care of it.
 Below are some tips that can help to improve the performance of your laptop battery and make it last longer.
1. Keep your laptop clean. Laptop needs daily cleaning so as to avoid the blockage of the air vents. A blocked air vents tends togenerate more heat thus reducingthe life span of the battery.
2. Avoid leaving your laptop insideclosed car or direct sunlight because undue heat kills off a battery slowly.
3. Defrag your laptop hard drive. The basic rule is that the lower the CPU and hard drive load, the longer the laptop battery runs. Daily defragmenting the hard drive will lead to a lesser load which will enable the laptop to run faster.
4. Disable screensavers. Screensavers use CPU when PC is idle
5. Lower screen brightness. LCD screen and hard drive consumes battery power a lot. By dimming the brightness of the screen, some good amount of battery power.
6. Unplug unused external device. Some external devices such as flash drives, speaker, external mouse and keyboard etc are the biggest external source that drains out the battery power. If you don’t need them when running on battery, I will advise you to plug them out to increase standby time.
7. Use hibernate option instead ofsleep mode because the sleep mode option tends to draw power from the battery while hibernate option saves the computer work as is and then shuts down automatically.
8. Close unused programs. One needs to close unused programs to extend laptop battery life. Whenever an application is running in background, the CPU usage increase and the more the CPU runs, the more the battery power that will be exhausting. Always check the taskbar to see running programs that are of no use to you. Note that you need to avoid playing heavy games.
9. Add up more RAM if you’re laptop RAM is low. If you laptop RAM is low, your laptop will use Hard Disk as virtual memory and itwill reduce the battery power.
10. Always try to discharge your laptop battery completely once in a week so that every cell of your battery will work properly.
Bonus and Useful Tip
To get power efficiency report foryour laptop,
*. Click on START menu, type CMD, then right click cmd.exe and click on Run as Administrator.
*. On the command line, type powercfg -energy to view a power efficiency report.
Hope you find theses tips useful?
Have you found your own way to increase battery life of your laptop? Share the “˜life giving’ tipswith us in the comments.
Below are some tips that can help to improve the performance of your laptop battery and make it last longer.
1. Keep your laptop clean. Laptop needs daily cleaning so as to avoid the blockage of the air vents. A blocked air vents tends togenerate more heat thus reducingthe life span of the battery.
2. Avoid leaving your laptop insideclosed car or direct sunlight because undue heat kills off a battery slowly.
3. Defrag your laptop hard drive. The basic rule is that the lower the CPU and hard drive load, the longer the laptop battery runs. Daily defragmenting the hard drive will lead to a lesser load which will enable the laptop to run faster.
4. Disable screensavers. Screensavers use CPU when PC is idle
5. Lower screen brightness. LCD screen and hard drive consumes battery power a lot. By dimming the brightness of the screen, some good amount of battery power.
6. Unplug unused external device. Some external devices such as flash drives, speaker, external mouse and keyboard etc are the biggest external source that drains out the battery power. If you don’t need them when running on battery, I will advise you to plug them out to increase standby time.
7. Use hibernate option instead ofsleep mode because the sleep mode option tends to draw power from the battery while hibernate option saves the computer work as is and then shuts down automatically.
8. Close unused programs. One needs to close unused programs to extend laptop battery life. Whenever an application is running in background, the CPU usage increase and the more the CPU runs, the more the battery power that will be exhausting. Always check the taskbar to see running programs that are of no use to you. Note that you need to avoid playing heavy games.
9. Add up more RAM if you’re laptop RAM is low. If you laptop RAM is low, your laptop will use Hard Disk as virtual memory and itwill reduce the battery power.
10. Always try to discharge your laptop battery completely once in a week so that every cell of your battery will work properly.
Bonus and Useful Tip
To get power efficiency report foryour laptop,
*. Click on START menu, type CMD, then right click cmd.exe and click on Run as Administrator.
*. On the command line, type powercfg -energy to view a power efficiency report.
Hope you find theses tips useful?
Have you found your own way to increase battery life of your laptop? Share the “˜life giving’ tipswith us in the comments.
Below are some tips that can help to improve the performance of your laptop battery and make it last longer.
1. Keep your laptop clean. Laptop needs daily cleaning so as to avoid the blockage of the air vents. A blocked air vents tends togenerate more heat thus reducingthe life span of the battery.
2. Avoid leaving your laptop insideclosed car or direct sunlight because undue heat kills off a battery slowly.
3. Defrag your laptop hard drive. The basic rule is that the lower the CPU and hard drive load, the longer the laptop battery runs. Daily defragmenting the hard drive will lead to a lesser load which will enable the laptop to run faster.
4. Disable screensavers. Screensavers use CPU when PC is idle
5. Lower screen brightness. LCD screen and hard drive consumes battery power a lot. By dimming the brightness of the screen, some good amount of battery power.
6. Unplug unused external device. Some external devices such as flash drives, speaker, external mouse and keyboard etc are the biggest external source that drains out the battery power. If you don’t need them when running on battery, I will advise you to plug them out to increase standby time.
7. Use hibernate option instead ofsleep mode because the sleep mode option tends to draw power from the battery while hibernate option saves the computer work as is and then shuts down automatically.
8. Close unused programs. One needs to close unused programs to extend laptop battery life. Whenever an application is running in background, the CPU usage increase and the more the CPU runs, the more the battery power that will be exhausting. Always check the taskbar to see running programs that are of no use to you. Note that you need to avoid playing heavy games.
9. Add up more RAM if you’re laptop RAM is low. If you laptop RAM is low, your laptop will use Hard Disk as virtual memory and itwill reduce the battery power.
10. Always try to discharge your laptop battery completely once in a week so that every cell of your battery will work properly.
Bonus and Useful Tip
To get power efficiency report foryour laptop,
*. Click on START menu, type CMD, then right click cmd.exe and click on Run as Administrator.
*. On the command line, type powercfg -energy to view a power efficiency report.
Hope you find theses tips useful?
Have you found your own way to increase battery life of your laptop? Share the “˜life giving’ tipswith us in the comments.
get free 55mb on etisalat
HOW TO GET 55MB ON YOUR ETISALAT SIM CARD
get free 55mb on etisalat
1. This is the Trick, First You all know that if you Load N100 Etisalat airtime, You will be given 5mb, For those on Easycliq package, Just Dial *330*1# , You will be given 1MB. Do it for Twenty times you will be given 20MB all together, That is 25MB.
2. After that, Load another N100 you will be given 10MB all together that is 35MB Repeat the 1MB Step for twenty times you will be given another 20MB all together that is 55MB.
GET 30MB FREE ON ETISALAT EASY LIFE
GET 30MB FREE ON ETISALAT EASY LIFE
Etisalat Nigeria now offers subscribers FREE 1MB data daily on the new EasyLife 3.0 plan . The new plan also lets you make calls to all networks in Nigeria, US, UK landlines, Canada, India and China at the rate of 20k per second. There is a N5 daily accessfee for this service. In total, an easy life 3.0 subscriber will get free 30Mb data in a month to browse from their mobile phones and PC.
 Etisalat have also dropped the access fee on Homezone 2.0 from N10 to N5 daily, and now also gives 1MB free data and callsat 20kobo per second to all networks and 5 international countries as well. The same free data and voice tariffs have been extended to Easycliq subscribers when they opt-in to Cliq for the day. In addition to these benefits,new subscribers to the Etisalat network will get 30% of all their recharges back after their first 30 days on the network when they register their SIMs.
Etisalat launched Easylife in 2010 reducing its tariffs to 25kobo persecond for a daily opt-in fee of N20. The introduction of Easylife paved way for affordable GSM tariffs in Nigeria alongside its many other firsts.
EasyLife 3.0 in Summary
• 20k to call anyone, anytime in US (mobile and land line), UK (land line), Canada, China & India
• 20k to call anyone, anytime on any network anywhere in 9ja
• 1 MB worth of FREE browsing daily
• 30% on all recharges within 30days for new customers to callall networks
• Daily access charge: N5 only
To subscribe to Easylife 3.0, Dial *420*1# .
Etisalat have also dropped the access fee on Homezone 2.0 from N10 to N5 daily, and now also gives 1MB free data and callsat 20kobo per second to all networks and 5 international countries as well. The same free data and voice tariffs have been extended to Easycliq subscribers when they opt-in to Cliq for the day. In addition to these benefits,new subscribers to the Etisalat network will get 30% of all their recharges back after their first 30 days on the network when they register their SIMs.
Etisalat launched Easylife in 2010 reducing its tariffs to 25kobo persecond for a daily opt-in fee of N20. The introduction of Easylife paved way for affordable GSM tariffs in Nigeria alongside its many other firsts.
EasyLife 3.0 in Summary
• 20k to call anyone, anytime in US (mobile and land line), UK (land line), Canada, China & India
• 20k to call anyone, anytime on any network anywhere in 9ja
• 1 MB worth of FREE browsing daily
• 30% on all recharges within 30days for new customers to callall networks
• Daily access charge: N5 only
To subscribe to Easylife 3.0, Dial *420*1# .
Etisalat have also dropped the access fee on Homezone 2.0 from N10 to N5 daily, and now also gives 1MB free data and callsat 20kobo per second to all networks and 5 international countries as well. The same free data and voice tariffs have been extended to Easycliq subscribers when they opt-in to Cliq for the day. In addition to these benefits,new subscribers to the Etisalat network will get 30% of all their recharges back after their first 30 days on the network when they register their SIMs.
Etisalat launched Easylife in 2010 reducing its tariffs to 25kobo persecond for a daily opt-in fee of N20. The introduction of Easylife paved way for affordable GSM tariffs in Nigeria alongside its many other firsts.
EasyLife 3.0 in Summary
• 20k to call anyone, anytime in US (mobile and land line), UK (land line), Canada, China & India
• 20k to call anyone, anytime on any network anywhere in 9ja
• 1 MB worth of FREE browsing daily
• 30% on all recharges within 30days for new customers to callall networks
• Daily access charge: N5 only
To subscribe to Easylife 3.0, Dial *420*1# .
How to get #500 with #2 instead of #100
It's not new that MTN give you#500 when you use #100 per day and the #500 bonus also expire at 12 O'clock that Mid-night.
If you use N100 Credit, You get N500 Bonus. If you Exhaust N200 you get N1000. You needto first dial *507# and make sure you receive confirmation sms to enjoy the bonus as you used N100 recharge card.
 => Now to get N500 with N2 make sure you are on MTN Zone [Dial *135*1# to migrate to MTN Zone] and make sure that you have minimum of #2 on your phone.
Wake up any time after 12 O'clock at mid night and call any number [MTN] Use the N2 and you we be given a N500 Bonus that you can use to call all MTN Numbers through out that day.
=> Now to get N500 with N2 make sure you are on MTN Zone [Dial *135*1# to migrate to MTN Zone] and make sure that you have minimum of #2 on your phone.
Wake up any time after 12 O'clock at mid night and call any number [MTN] Use the N2 and you we be given a N500 Bonus that you can use to call all MTN Numbers through out that day.
=> Now to get N500 with N2 make sure you are on MTN Zone [Dial *135*1# to migrate to MTN Zone] and make sure that you have minimum of #2 on your phone.
Wake up any time after 12 O'clock at mid night and call any number [MTN] Use the N2 and you we be given a N500 Bonus that you can use to call all MTN Numbers through out that day.
How to Get 1mb on mtn for #5
This is a bonus bonus data, I say it is more unless free mb by mtn
The New Plan is called MTN Data Delight , With this New Plan you can Browse the Internet on the World Most Flexible Plan.. 1MB cost just N5 Daily.
>> To Subscribe to the MTN Data Delight, Just Text 350 to 131 for 1MB at N5 Daily.
The New Plan is called MTN Data Delight , With this New Plan you can Browse the Internet on the World Most Flexible Plan.. 1MB cost just N5 Daily.
>> To Subscribe to the MTN Data Delight, Just Text 350 to 131 for 1MB at N5 Daily.
HOW TO DOWNLOAD YOUTUBE VIDEO ON MOBILE PHONE
Mobile Browsing is popular thing now after the mobile browser arrive such as Operamini and UCWEB Browser, reading some good informations make us happy, and of course downloading some free applications and videos mp3will make mobile browser happy.
That’s why here I will present you how to Download Youtube Video on Your Mobile Opera Mini and UCWEB Browser
Download YouTube Video Using JavascriptCode For UCWEB users:
 *. Go to youtube.com andof course search the video you want to watch.
*. Click on the videoyou desired.
*. You will see the images of the video and under the image, watchvideo. Now go toMenu, Tools and Page Info.
*. You will see the URL of the video and the word COPY beside the url! Click COPY then exit.
*. Go to Menu againthen OPEN then ADDRESS.
*. Paste the The URL of the Video you copied!
*. AGAIN, replace the m. To ss Example: m.youtube.com/watch?jmgagt to ssyoutube.com/watch?jmgagt
*. It will bring you to a site, You can choose again theformat you want to your video downloaded.
*. Click SAVE!
*. Download and now you can watch the video on your celphone! ENJOY!
Just Follow This 5 Simple Steps for Opera Mini:
Step 1: Go to m.youtube.com
Step 2 : Find your Desire Video using the search bar (Ex. Music Video, Funny Videos)
Step 3: Select the video you want to download
Step 4: After you Select the Video, go to the address barand change the m.youtube.comto ssyoutube.com(Also removethe other address next to youtube.comand just leave the watch?v=VideoCODE)
Step 5: Video is ready to download and you can select which format you like depends on the capability ofyour mobile phone.
*. Go to youtube.com andof course search the video you want to watch.
*. Click on the videoyou desired.
*. You will see the images of the video and under the image, watchvideo. Now go toMenu, Tools and Page Info.
*. You will see the URL of the video and the word COPY beside the url! Click COPY then exit.
*. Go to Menu againthen OPEN then ADDRESS.
*. Paste the The URL of the Video you copied!
*. AGAIN, replace the m. To ss Example: m.youtube.com/watch?jmgagt to ssyoutube.com/watch?jmgagt
*. It will bring you to a site, You can choose again theformat you want to your video downloaded.
*. Click SAVE!
*. Download and now you can watch the video on your celphone! ENJOY!
Just Follow This 5 Simple Steps for Opera Mini:
Step 1: Go to m.youtube.com
Step 2 : Find your Desire Video using the search bar (Ex. Music Video, Funny Videos)
Step 3: Select the video you want to download
Step 4: After you Select the Video, go to the address barand change the m.youtube.comto ssyoutube.com(Also removethe other address next to youtube.comand just leave the watch?v=VideoCODE)
Step 5: Video is ready to download and you can select which format you like depends on the capability ofyour mobile phone.
*. Go to youtube.com andof course search the video you want to watch.
*. Click on the videoyou desired.
*. You will see the images of the video and under the image, watchvideo. Now go toMenu, Tools and Page Info.
*. You will see the URL of the video and the word COPY beside the url! Click COPY then exit.
*. Go to Menu againthen OPEN then ADDRESS.
*. Paste the The URL of the Video you copied!
*. AGAIN, replace the m. To ss Example: m.youtube.com/watch?jmgagt to ssyoutube.com/watch?jmgagt
*. It will bring you to a site, You can choose again theformat you want to your video downloaded.
*. Click SAVE!
*. Download and now you can watch the video on your celphone! ENJOY!
Just Follow This 5 Simple Steps for Opera Mini:
Step 1: Go to m.youtube.com
Step 2 : Find your Desire Video using the search bar (Ex. Music Video, Funny Videos)
Step 3: Select the video you want to download
Step 4: After you Select the Video, go to the address barand change the m.youtube.comto ssyoutube.com(Also removethe other address next to youtube.comand just leave the watch?v=VideoCODE)
Step 5: Video is ready to download and you can select which format you like depends on the capability ofyour mobile phone.
Subscribe to:
Posts (Atom)